ES
ES
 DE
DE
 FR
FR
 IT
IT
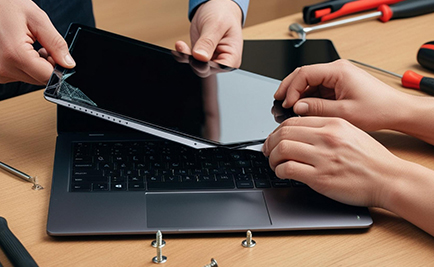
Has your laptop screen stopped working and you've decided to replace it? Here's a detailed tutorial to help you install a new screen with complete peace of mind.
Identify your screen's slab type
Before getting started, it's important to identify your screen's slab type. There are three main configurations:
- Screw-down: the screen is fixed with screws, often at the corners or edges.
- Bonded panel: the screen is attached with adhesive to the shell or to metal supports.
- Screen with integrated touchscreen glass: the touchscreen glass is glued on top of the panel.
Good to know: When purchasing a new screen, the part numbers may differ slightly from the original. This is a compatible model, sometimes a little less wide, but this will not affect its operation or installation.
Replacing a screw-in tile: the simple method
In most cases, this type of screen is the easiest to replace. Here are the steps:
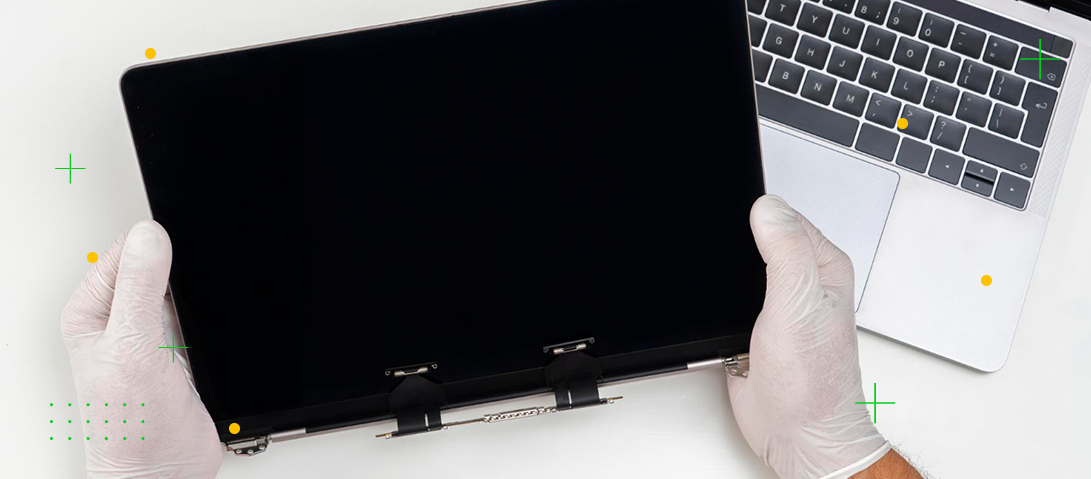
1. Remove the screen frame:
Carefully detach the frame surrounding the screen to gain access to the slab.
2. Identify screw attachment:
Corner screws (slim slabs):
Unscrew the screws near the corners of the slab, then disconnect the connection cable at the back.
- Plug in the new screen.
- Test its operation before removing the protective film and securing it permanently.
- Screw the panel back on and replace the frame.
Screws on the edges :
If the screws are on the sides, gently pull the screen towards you to access the fasteners. Remove the side rails, if present, to install the new screen. As with slim tiles, test the screen before fixing it permanently.
3. Reassemble the screen:
Once the test has been successfully completed, follow the reverse steps to replace the screen and frame.
Replacing a bonded panel: a meticulous operation
For this type of panel, more care is required. There are two possible scenarios:
1. Slab stuck to the rear shell :
- Use a plastic tool (such as a disassembly stick) to unstick the panel without damaging the hull.
- Once unstuck, disconnect the tablecloth and install the new panel.
2. Slab attached to metal uprights :
- Unscrew the metal side brackets from the original screen.
- Reuse these brackets to attach the new screen, as they are not usually included with new screens.
- Assemble the screen as described above.
Precautions before you start
- Back up your data: Even if the installation does not affect your files, it is always advisable to protect your data before any hardware manipulation.
- Use the right tools: Use appropriate tools, such as precision screwdrivers or plastic sticks, to avoid damaging components.
- Work in a clean, well-lit area: This reduces the risk of dust or errors.
Replacing a laptop screen can be simple or more technical, depending on how the screen is attached. Screw-down screens are generally easy to handle, while glued screens or those with touch-sensitive glass require greater precision. If you follow this step-by-step guide and proceed with care, you should be able to install your new screen without difficulty.